Has it ever happened to you, all excited to start designing a new item of preference, with that fabric you have been saving for such a glorious design, just to find out it has frayed quite a part of it?
When you think about it, it was a cause of your lack of knowledge or lack of carefulness. But we are here to help you fix this mistake so it does not happen again. So, in this article today, we’ll be talking about how to stop the fabric from fraying. Read on!
Key Takeaways
- Fraying can be caused by getting in contact with a non-smooth surface
- Use flame either from a lighter or a candle to stop the edges from fraying
- Nail polish and glue are a simple quick fix to stick the fibers together
- Use fabric fusion tape that is activated by heat
- Fusible interface is great for damages or fraying in the midway of the fabric
- Use a sewing machine or an overlock machine to finish the fabric with thread
In short: How to stop the fabric from fraying?
To prevent the fabric from fraying there are a couple of solutions that you could try such as fabric glue, fabric sealant, pinking shears/scissors, nail polish, candle-lit flame, or fabric fusion tape. While some are more effective than others, you can try playing around to see which one provides you with better results.
So, what can cause the fabric to fray?
The fabric can be frayed as a result of getting in contact with a non-smooth surface, having severe strokes to it, or not using proper tools to treat it.
First of all, you need to know the fabric you are dealing with since some materials might fray more than others. So, it depends on the fibers that make the material. For example, fabrics like linen, burlap, denim, and so on. So, you need to put additional care when handling such materials.
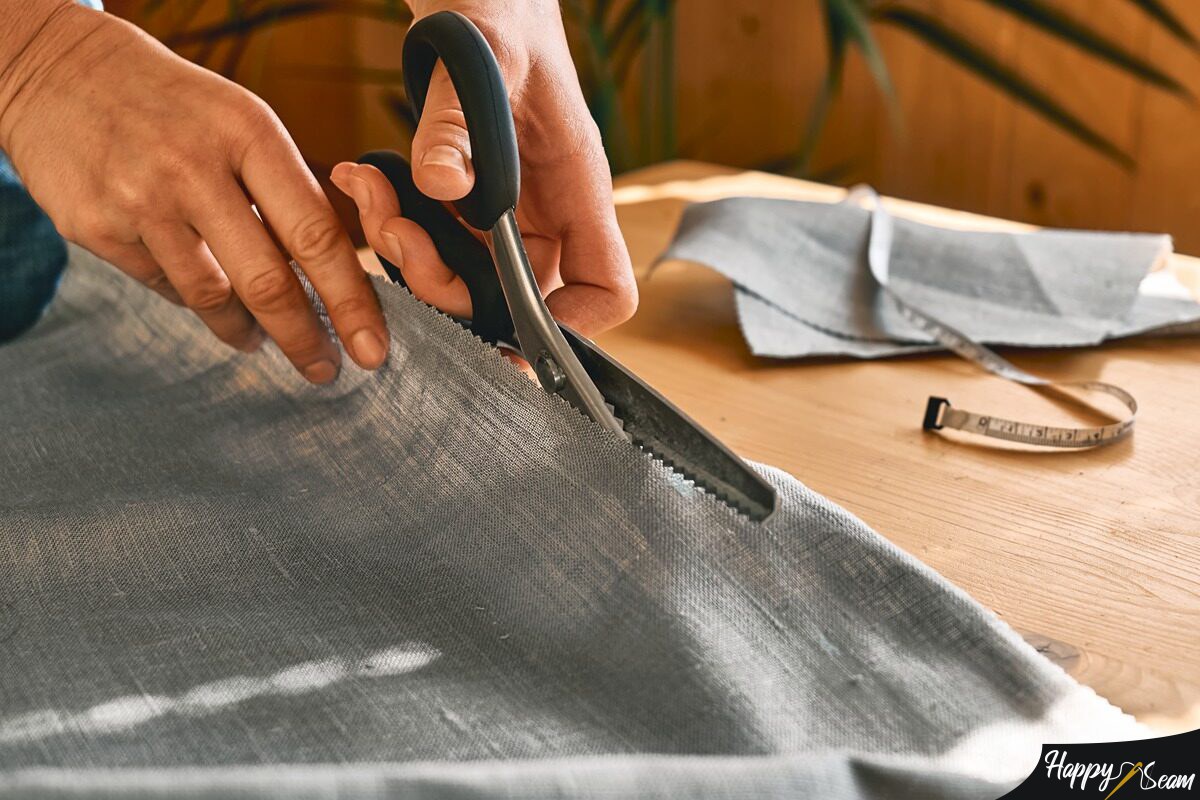
Scissors/Pinking Shears
Take a look at the scissors you usually use. They might have rounded up, or may not even be made to cut fabric. Purchase some sharp fabric-cutting scissors and they will make your work way easier and will not damage the fabric you are trying to style, sew and wear later.
If your scissors have rounded up, I’d suggest you sharpen them, there are different ways you can sharpen your scissors but for a better outcome, I’d suggest you let a professional handle your scissors since you can damage them severely, to such an extent that you might need new ones after all.
Although there are different kinds of scissors, primarily I was talking about scissors with straight blades. There is something called pinking shears, which are scissors but not straight blade ones, they have blades that look like crocodile teeth, and they result in a zigzag finish of the fabric.
It stops fabric from fraying excessively as a result of the zigzag compact cut. It even looks visually pleasing but also gets the job done nicely. I suggest that you let a professional sharpen these scissors as well. Consider polishing your scissors from time to time too.
How to prevent the fabric from fraying?

There are a couple of ways to prevent fraying if in your case you do not own a pair of pinking shears. A couple of over-the-counter solutions are glue, flame, nail polish, and so on.
Glue
Any type of glue does it, fabric glue or hot glue does not matter whatsoever. In the end, it is important that the fibers of the fabric glue together and don’t fray. All you need to do is press a layer of glue on the edges of the fabric that is prone to fraying.
Nail Polish
The same goes practically with nail polish. Just like glue, nail polish also sticks the fibers together preventing the fabric from fraying. What I usually use is clear nail polish, but in absence of it you might even use other nail polish colors, but my preference is a similar color to the fabric if it is possible in that case.
Candle-lit flame/lighter
Flame can be used in synthetic materials carefully since it burns as a result of the plastic elements in their fibers. Any kind of flame is okay to use, either candle-lit flame or lighter. Approach the fabric near the flame cautiously enough so the edges burn but you don’t burn more fabric than you intend to do so.
I like to use a simple yet small candle since I find myself more in control of what is going on and how much I want the edges to burn. And of course, for safety reasons. Another thing to be careful of is the place where you are working and your surroundings. Make sure you are in a safe fire-using zone.
Fabric fusion tape
When it comes to heat, there is also something called fabric fusion tape. It’s a double-sided tape, and it activates after there’s some heat applied, by the iron. When you add the tape on the inside of the fabric apply some heat and then take off the paper above and fold the wanted side and how much you want to fold it, then apply pressure and heat again.
The downside might be that the fusion tape can not be used on transparent materials, as a result of the characteristics of the fabric even the tape will be noticeable.
The fusible interface is used as an additional layer to the fabric, on the inside of the fabric, since it is not an accessory or for visual effects. It is usually used when there is a piece of fabric that needs to stay in a certain position or form, or even to hold accessories, like embroidery, in place.
The fusible interface is also activated by applying heat, and since we mentioned that it makes the fabric stiff, it also sticks to the edges and stops the fabric from fraying. A fusible interface is a great solution to use especially in those cases when the fabric is damaged or frayed anywhere along it, not just the edges.
What else can you do?
Other times what you can do is flip the edges inside out, fold it and sew It either by hand, or by a sewing machine if you have one, and you know how to use it. Sewing it by hand can get overwhelming and very time-consuming so in the end, a sewing machine is a better and faster solution to end fraying edges.
If you have a sewing machine but you don’t know how to use one, I suggest you test to try on an irrelevant piece of fabric or a scrap material as to not ruin the fabric you are trying to fix. An overlock machine is designed to finish the edges of the fabric and it is widely used.
So, if you can lay your hand on an overlock machine it’s the easiest way, and it even looks nicely finished. What it does is it cuts the extra fabric you don’t need and sews the thread around the fabric you chose to do so. I advise using similar thread color to the fabric since it will not be noticeable. Even some regular sewing machines might have an optional overlock stitch.
Also Read: Is Fabric Glue Washable, or Not?
Final Words
I hope I was able to provide simple and easy solutions that are available to everyone. To get better results, I’d recommend you play around with your options to see which one works better for you. Thank you for sticking to the end of this article, see you in the next one!
I am a proud mother of two amazing daughters, and i run our sewing & embroidery business full time. I am also a part-time writer for this blog, because i love sharing my findings and experiences!